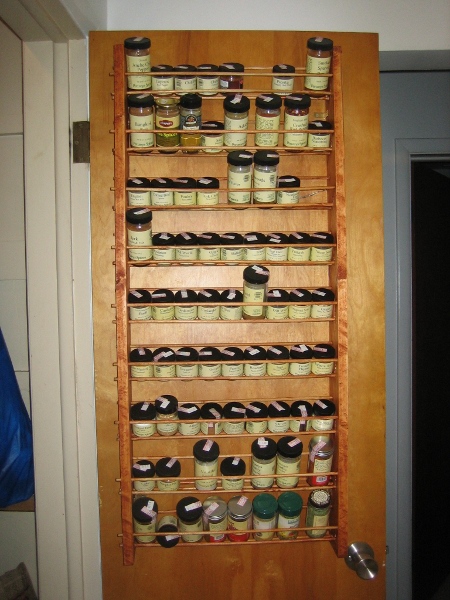
Parts:
- 2 boards: 36" long and about 3-1/2"
- 23 dowels: 36" long and 1/4" diameter
- 4 metal angle brackets
- Mallet
- Drill
- 30/60/90 triangle (like for geometry class)
- Ruler or tape measure
- C-clamps
- 1/4" wood drill bit
- Small drill bit (for pre-drilling screw holes)
- Screwdriver
- Saw (and a saw box, if you have one)
- Level
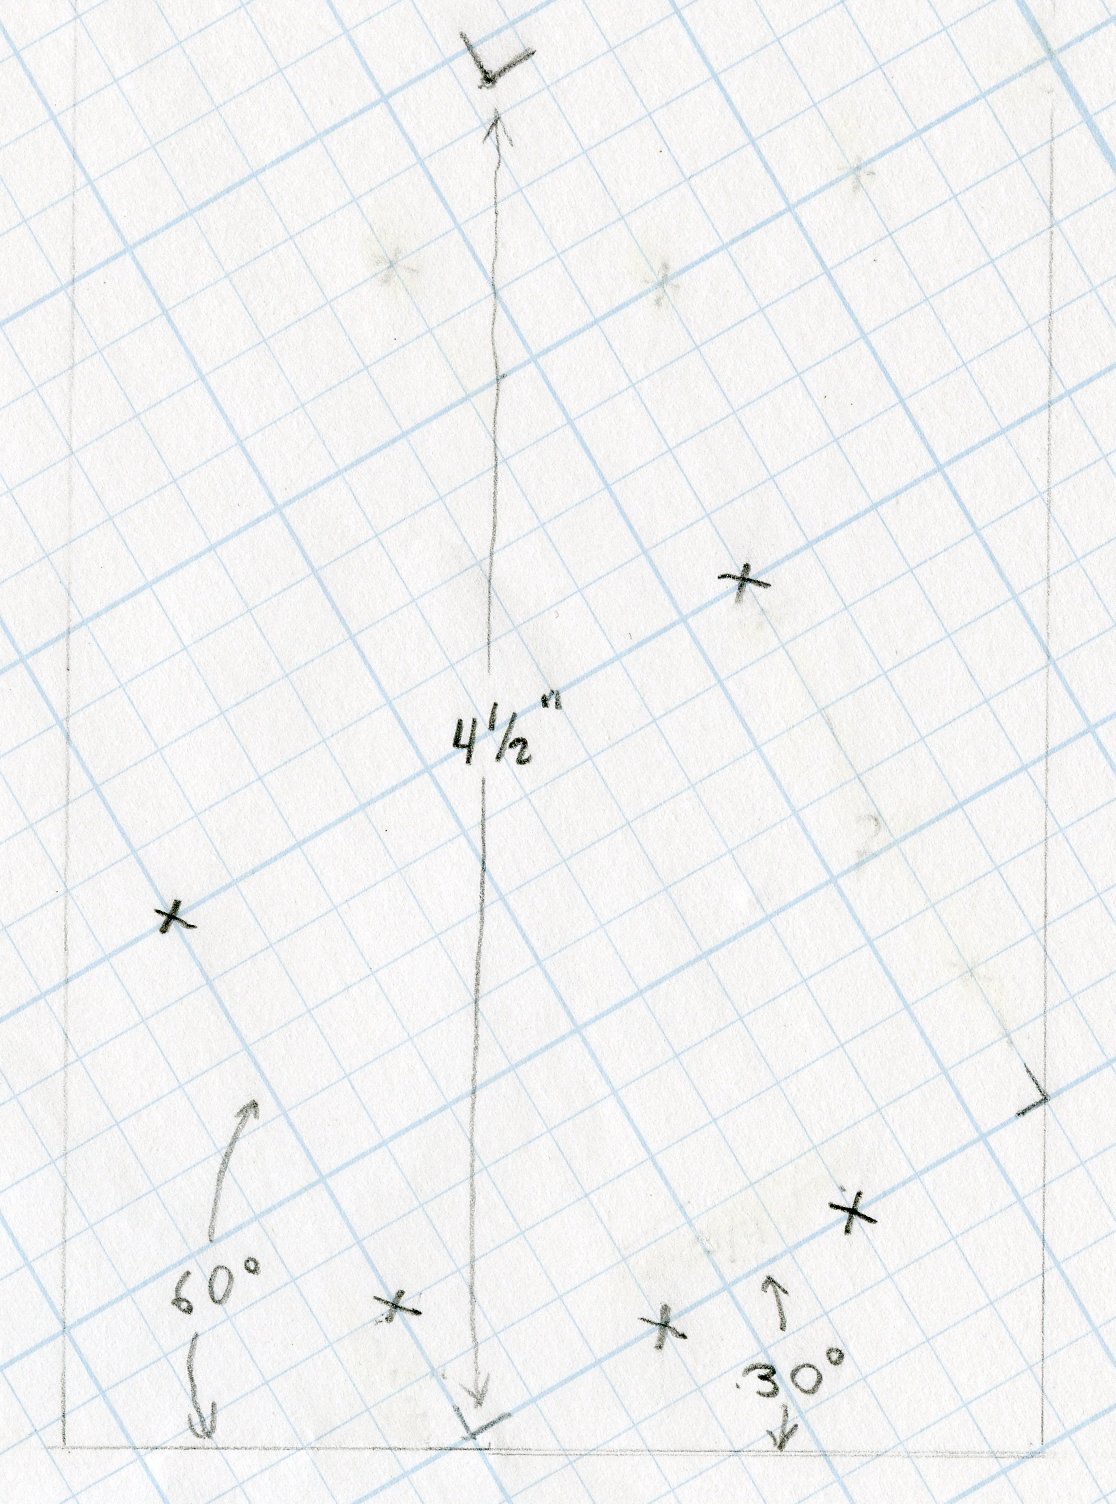
- On the pattern below, the X's represent the centers of drill holes. Each small square is 1/4" long. Draw this pattern onto the end of one of the boards using the 30/60/90 triangle. The left side of the diagram corresponds to the front side of the spice rack.
- Repeat the pattern 4-1/2" apart for each row in the rack.
- Clamp the two boards together with the drawn pattern visible on top.
- Drill 1/4" holes centered on each X drawn.
- Saw the dowels in half.
- Stain or paint the boards and dowels, if you want to.
- Pound the dowels into the drill holes.
- Screw the angle brackets onto the boards so they are flush with the back of the spice rack.
- Screw the angle brackets onto the door. Make it level, of course.

Notes:
- Make sure hole for the dowels are drilled at a straight 90 degrees, so the dowels don't go in crooked.
- When drilling holes through the two boards, press some scrap wood against where the drill bit will go out the other side, to prevent the bottom board from splintering.
- If the dowels are are the same size or bigger than the holes, you won't need glue to hold the rack together.
- It's easier to stain the rack before putting it together than after.


